Essential Baking Tools Every Home Baker Needs (With Budget Options)
Stepping into the baking side of a kitchen store can feel like entering a whole new world. There are tools you’ve never seen before, endless options that make you second-guess everything, with no clear idea of what’s essential and what’s not.
If you’ve ever stood there wondering whether you really need a $120 stand mixer just to make a batch of cookies, or whether that fancy rolling pin is truly essential, this post is for you.
You don’t need to spend a fortune to bake well. Some of the best bakers in the world started with nothing more than a bowl, a wooden spoon, and a basic oven. The tools matter, yes but which tools you buy and how much you spend on them matters a lot less than you think.
In this guide, we’re breaking down every essential baking tool a home baker needs, what each one does, why it’s worth having, and most importantly, the best budget options that won’t leave a dent in your wallet. Whether you’re starting from scratch or filling in the gaps in your kitchen kit, this is your best guide to building a solid baking toolkit.
Let’s get into it.
Why Having the Right Baking Tools Matters
Before we dive into the list, let’s quickly talk about why tools matter in baking, because it’s not just about convenience.
Baking is precise. Unlike cooking, where you can often just add ingredients based on your thought or conviction, baking relies on accurate measurements and conversion, consistent temperatures, and the right physical interactions between your ingredients. A missing or incorrect tool doesn’t just make things harder, it can actually affect your results.
For example, using a liquid measuring cup for flour gives you an inaccurate measurement, which leads to dense, dry baked goods. Not using a cooling rack means your cookies go soggy underneath as they sit in their own steam. Baking in a dark pan instead of a light one can cause your cake to overbrown before it’s cooked through.
That said, you don’t need fancy, expensive tools to get good results. You just need the right tools and you need to know how to use them. That’s exactly what this guide Essential Baking Tools Every Home Baker Needs is here to help with.
The Tools Every Baker Needs: A Complete Guide
We’ve organised this list into categories so it’s easy to navigate. We’ll start with the most critical tools and work our way down to the ones that are helpful but less urgent.
Save this guide: The Ultimate Beginners Guide to Baking
Measuring Tools: The Foundation of Good Baking
If there’s one category where you should never cut corners, it’s measuring. Baking is chemistry, and accurate measurements are the backbone of every successful recipe. This is the first thing to invest in before anything else.
Dry Measuring Cups
Dry measuring cups are designed to be filled to the brim and levelled off with a flat edge. They come in sets of standard sizes — usually ¼ cup, ⅓ cup, ½ cup, and 1 cup.
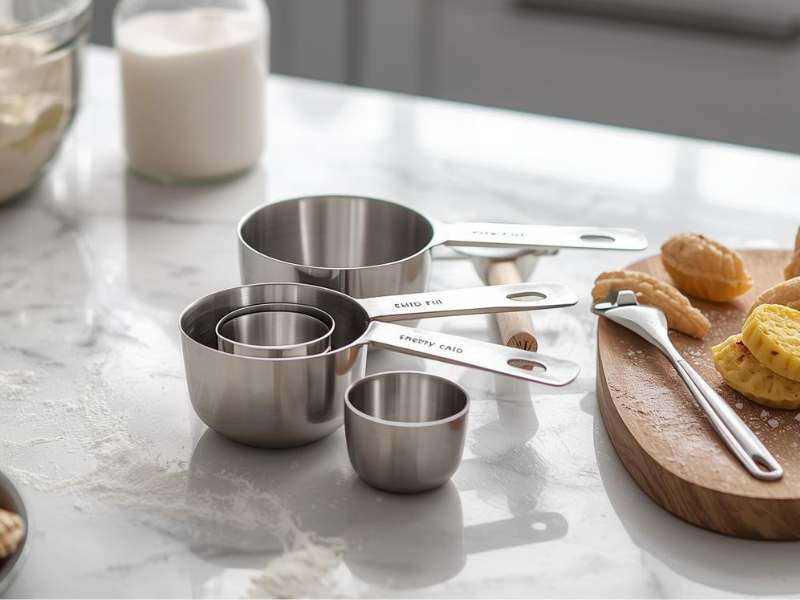
They’re used for measuring ingredients like flour, sugar, oats, cocoa powder, and other dry or semi-solid ingredients like peanut butter or sour cream.
Why it matters: Dry and liquid measuring cups are not interchangeable. Dry cups let you level off the ingredient for accuracy. Liquid cups are designed to be read at eye level with extra space at the top to prevent spilling.
Budget option: A basic stainless steel or plastic dry measuring cup set costs very little — usually between $5–$10 for a full set. You don’t need to spend more than this. Look for cups with clearly engraved measurements (not printed, as those fade) and a comfortable handle.
Liquid Measuring Cups
A liquid measuring cup is usually made from glass or clear plastic with a spout and measurement markings on the side. You fill it, then read the level at eye level.
Why it matters: When measuring liquids like milk, water, oil, or buttermilk, you need to be able to see the level clearly. Trying to measure liquid in a dry cup is messy and inaccurate.
Budget option: A standard 2-cup (500ml) glass Pyrex measuring cup is a kitchen classic for a reason. It’s affordable (usually $8–$12), durable, goes in the microwave, and lasts for decades. Start with one 2-cup size — that covers most recipes.
Measuring Spoons
Measuring spoons are used for small amounts of ingredients — baking powder, baking soda, salt, spices, vanilla extract, and similar. They typically come in sets of ¼ teaspoon, ½ teaspoon, 1 teaspoon, and 1 tablespoon.
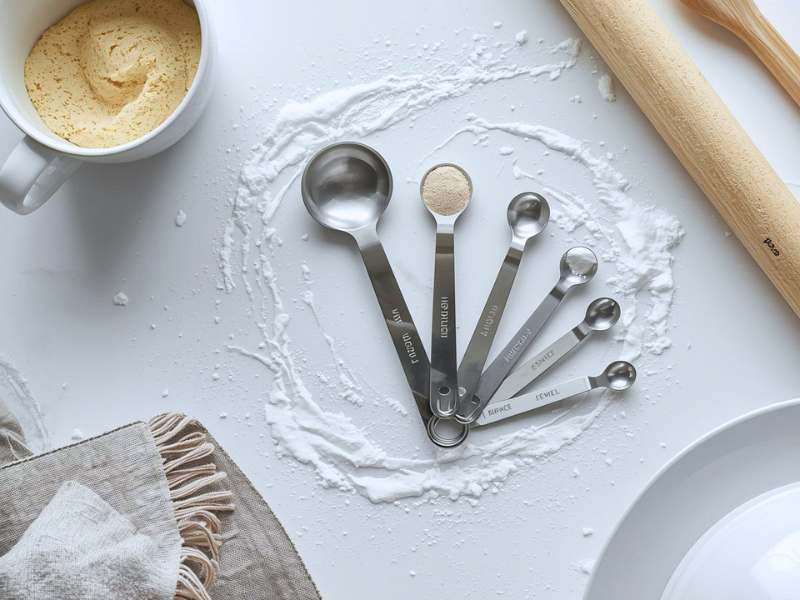
Why it matters: In baking, even a small difference in leavening agents can change your entire result. A little too much baking soda and your baked goods taste metallic. A little too much salt and it’s all you taste. Measuring spoons keep these small but critical quantities accurate.
Budget option: A basic stainless steel measuring spoon set is widely available for $5–$8. Look for a set that includes a ⅛ teaspoon as well — you’ll thank yourself later.
A Kitchen Scale
A kitchen scale is arguably the single most useful tool a home baker can own, and yet so many beginners skip it. Here’s why that’s a mistake: measuring by weight is far more accurate than measuring by volume.
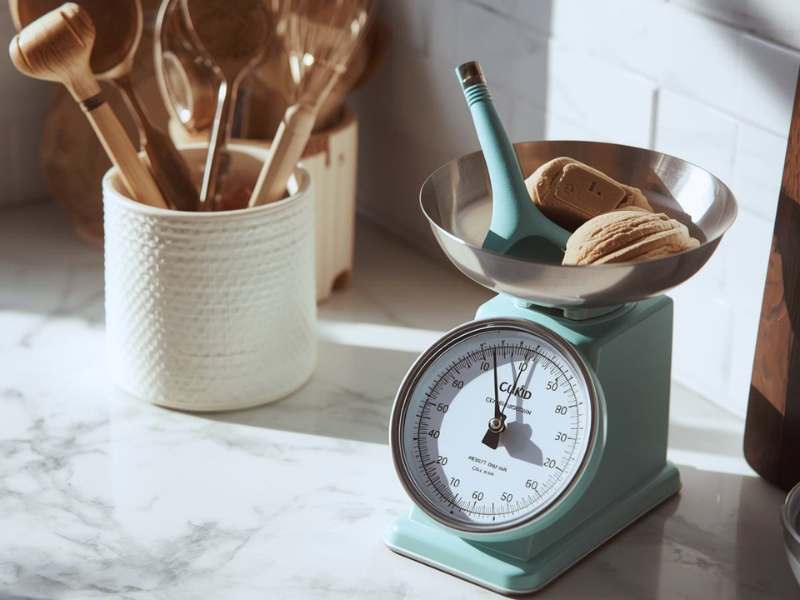
Think about flour. If you scoop flour directly from the bag into a cup, you could pack in up to 50% more than you actually need. That means dense, dry, tough baked goods — and a mystery as to why your recipe failed. A scale eliminates all of that. 100g of flour is always exactly 100g, no matter how it’s packed.
Most professional recipes around the world use grams and millilitres. Once you start using a scale, you’ll never go back to cups.
What to look for: A digital kitchen scale that reads in grams and ounces, with a tare function (which resets the scale to zero after you place a bowl on it, so you can add ingredients directly without weighing the container).
Budget option: There are excellent digital kitchen scales available for $10–$15. Look for one that reads in 1g increments, has a tare button, and a weight capacity of at least 5kg (11 lbs). Brand doesn’t matter much at this price poinT, they work essentially the same.
Mixing Tools: Getting Everything Together
Mixing might sound simple, but the tools you mix with can genuinely affect the texture and quality of the things you bake. Here’s what you need.
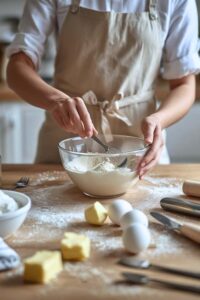
Mixing Bowls
You’ll need a set of mixing bowls in at least two or three different sizes. Bowls are used for mixing batters, proofing dough, holding prepped ingredients, and more.
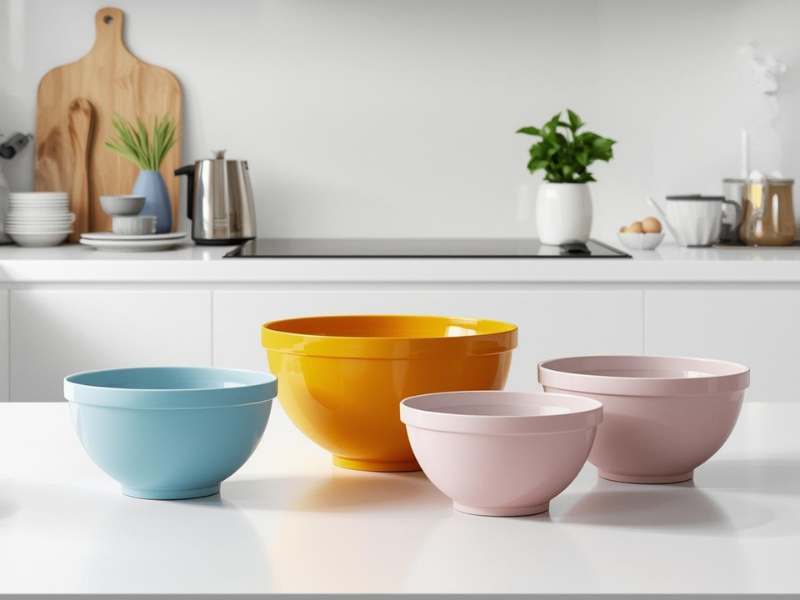
What material is best? Stainless steel is the top choice for most bakers. It’s lightweight, durable, non-reactive (meaning it won’t affect the taste of acidic ingredients), easy to clean, and inexpensive. Glass bowls are also great because they’re microwave-safe and you can see through the sides. Plastic bowls are cheap but tend to absorb smells and can hold grease even after washing, which is a problem when you need to whip egg whites (any trace of grease prevents them from whipping properly).
Budget option: A set of three or four stainless steel mixing bowls in graduated sizes costs around $10–$20 and will last for years. Many come with lids, which is a bonus for storing things in the fridge.
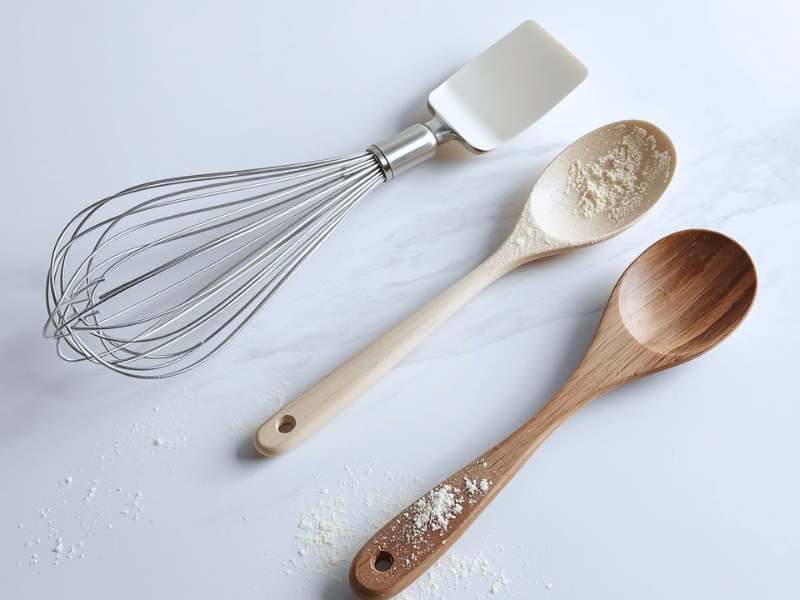
A Whisk
A whisk is one of those tools that seems so simple, but it’s remarkably useful. You’ll use it to combine dry ingredients, beat eggs, mix salad dressings, make sauces, and incorporate air into batters.
A standard balloon whisk — the classic teardrop-shaped one with several wire loops — is all you need. The wires trap air as you whisk, and the wide shape covers a lot of surface area quickly.
Budget option: A good metal balloon whisk costs $5–$8. Get one that’s around 10–12 inches long — comfortable for most bowls. The wires should feel sturdy, not flimsy, when you press them.
Rubber Spatulas and Silicone Spatulas
A rubber or silicone spatula is probably the tool you’ll use more than any other in baking. It’s what you use to fold batters, scrape the bowl clean, stir melting chocolate, smooth frosting, and scoop dough.
Why silicone over rubber? Silicone spatulas are heat-resistant, which means you can use them for tasks involving heat (like stirring a custard on the stovetop) without them melting or warping. They’re also non-stick friendly and easy to clean. Classic rubber spatulas are fine for cold mixing but can’t handle heat.
Budget option: A set of two or three silicone spatulas in different sizes costs around $8–$12. You’ll want at least a large one and a small one — the small one is great for scraping jars and getting into tight corners.
A Wooden Spoon
Old-fashioned, yes. Still essential, absolutely. A wooden spoon is perfect for stirring thick batters and doughs, mixing oats and granola, and any heavy mixing that would bend a whisk or strain a spatula.
Wooden spoons don’t scratch pans, they don’t conduct heat (so the handle stays cool), and they’re incredibly durable with basic care.
Budget option: A good wooden spoon costs next to nothing — usually $2–$5. Buy a couple so you always have one clean one available.
An Electric Hand Mixer
This is where we step up from purely manual tools. An electric hand mixer is a game-changer for tasks like creaming butter and sugar, whipping egg whites, beating heavy cream, and making frostings. Doing these by hand is possible, but it takes a lot of time and effort — and the results are often inconsistent.
A hand mixer is the budget-friendly alternative to a stand mixer. It’s compact, easy to store, easy to clean, and affordable. For most home bakers who bake occasionally, a hand mixer is all you’ll ever need.
Budget option: A basic 5-speed electric hand mixer with standard beater attachments and a whisk attachment costs around $20–$30. Look for one that includes at least two speeds and feels comfortable to hold. Mid-range brands offer great value at this price.
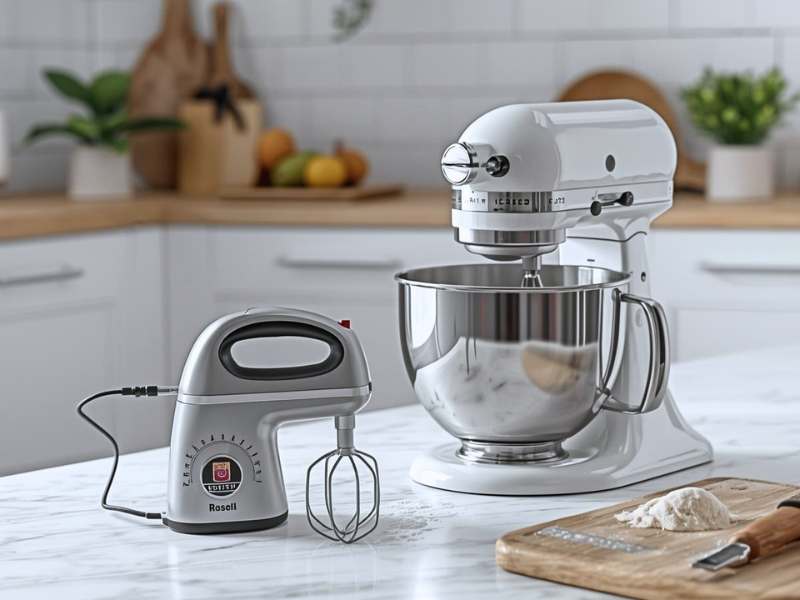
A Stand Mixer (Optional but Worth It Long-Term)
A stand mixer is the big investment piece of the baker’s kitchen. It sits on your counter, has a large bowl, and mixes hands-free — which means you can add ingredients while it’s running, or walk away and prep other things.
Stand mixers are particularly valuable for bread making (kneading dough is hard work by hand), large batch baking, and making anything that requires very long mixing times, like meringues or certain cake batters.
That said, a stand mixer is absolutely not a necessity for beginners. Start with a hand mixer and only upgrade if you find yourself baking frequently and wanting more capacity and convenience.
Budget option: Entry-level stand mixers from reputable brands start at around $100–$150. While the iconic KitchenAid is the gold standard, there are solid alternatives at lower price points. Look for a bowl size of at least 4.5 quarts and multiple speed settings.
Baking Pans and Tins: Your Non-Stick Foundations
Your choice of pan affects baking time, colour, texture, and how easily your baked goods release. Here’s what to prioritise.
Baking Sheets and Sheet Pans
A flat, rimmed metal baking sheet (also called a half-sheet pan) is probably the most versatile piece of bakeware you can own. It’s used for cookies, sheet cakes, roasting vegetables, toasting nuts, baking pastry, and so much more.
What to look for: Light-coloured, heavy-gauge aluminium is ideal. Dark pans absorb more heat and can cause over-browning on the bottom of cookies and other baked goods. Rimmed edges are essential — rimless “cookie sheets” can warp and are harder to handle safely.
You should own at least two baking sheets so you can rotate them through the oven.
Budget option: Restaurant-supply aluminium half-sheet pans are some of the best-value bakeware available. They cost around $10–$15 each, last forever, and bake beautifully. Skip the non-stick coating — parchment paper does a better job and the coating eventually scratches off anyway.
Round Cake Pans
If you ever want to make a layer cake, you’ll need at least two round cake pans in the same size. The standard size is 9 inches in diameter, and that’s what most recipes call for.
What to look for: Light-coloured aluminium, straight sides, and a solid construction that won’t warp in the oven. Non-stick is convenient but not necessary if you line your pans with parchment paper.
Budget option: A pair of 9-inch aluminium round cake pans costs around $10–$20 for both. This is one area where you genuinely don’t need to spend more — basic aluminium pans bake cakes beautifully.
A 9×13 Inch Baking Dish
This rectangular pan is your go-to for brownies, bar cookies, sheet cakes, lasagna, casseroles, and more. It’s one of the most-used pans in the kitchen.
Budget option: A basic aluminium or glass 9×13 inch baking dish costs around $10–$15. Glass dishes heat more slowly and evenly, which is great for things like brownies where you don’t want the edges to cook too fast. Metal pans heat faster and are better for things you want a crispier edge on.
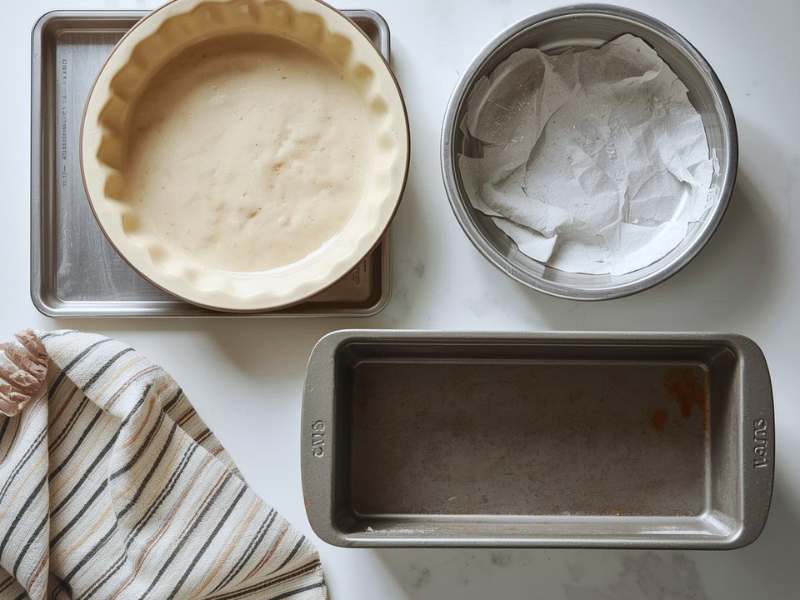
A Loaf Pan
A standard 9×5 inch loaf pan is essential for banana bread, pound cake, quick breads, and sandwich loaves. It’s a simple piece of kit, but one you’ll reach for regularly.
Budget option: A basic aluminium or non-stick loaf pan costs around $8–$12. Light-coloured aluminium is preferable for even baking, as always.
A Muffin Tin
A standard 12-cup muffin tin is used for muffins, cupcakes, egg bites, mini cheesecakes, and more. It’s one of those pans that earns its shelf space quickly.
Budget option: A basic non-stick 12-cup muffin tin costs around $10–$15. Even with non-stick coating, it’s worth using paper muffin liners — they make cleanup much easier and help muffins hold their shape.
A 9-Inch Pie Dish
If pies, quiches, or tarts are on your baking bucket list, a 9-inch pie dish is essential. Glass and ceramic dishes are traditional choices and distribute heat gently and evenly.
Budget option: A basic glass or ceramic 9-inch pie dish costs around $8–$15. Glass has the added advantage of letting you see the bottom crust as it browns, which is genuinely helpful.
Prep Tools: The Supporting Cast
These aren’t glamorous, but they’re the tools that make the actual process of baking smoother, more accurate, and less frustrating.
Parchment Paper
If there’s one supply that every baker should have an endless stock of, it’s parchment paper. It’s a heat-resistant, non-stick paper that you use to line pans before baking.
Parchment paper prevents sticking without grease, makes cleanup incredibly easy, helps baked goods release cleanly, and can be reused several times before it needs replacing.
Budget option: A roll of parchment paper costs $4–$8 and lasts for many, many bakes. Pre-cut parchment sheets are convenient but more expensive — a roll is better value for home bakers.
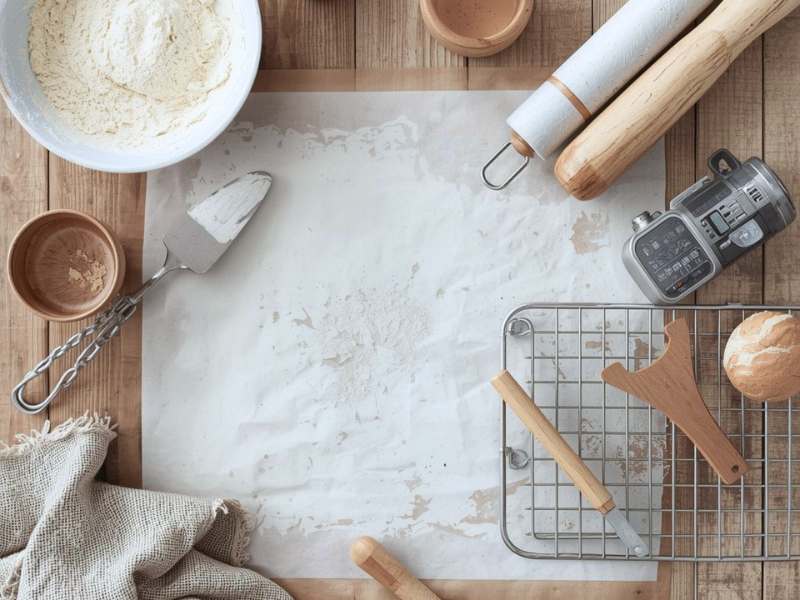
A Cooling Rack
A wire cooling rack is one of those tools that seems optional until you understand why it’s necessary. When you pull a hot pan from the oven and place it directly on a flat counter, the steam from the baked goods has nowhere to go — it condenses under the food and makes the bottom soggy.
A cooling rack elevates your baked goods and allows air to circulate all around them, so they cool evenly and stay crisp on the bottom.
Budget option: A basic stainless steel cooling rack costs $8–$12. Look for one with a grid pattern (rather than just parallel bars) so smaller items don’t fall through. Make sure it fits inside your baking sheet — this is handy for glazing and catching drips.
A Bench Scraper
A bench scraper (also called a dough scraper) is a simple flat metal blade with a handle. It looks unassuming, but it’s one of the most useful tools in a baker’s arsenal.
Use it to divide dough into portions, clean flour off your counter in seconds, transfer chopped ingredients from cutting board to bowl, smooth the sides of frosted cakes, and cut through pastry.
Budget option: A basic stainless steel bench scraper costs around $6–$10. It’s one of those tools where price genuinely doesn’t indicate quality — a cheap one works just as well as an expensive one.
A Rolling Pin
A rolling pin is essential for rolling out pastry, pie dough, cookie dough, pizza dough, and more. There are two main styles: the classic American-style rolling pin with handles, and the French-style tapered pin with no handles.
For beginners, the handled rolling pin is more intuitive and easier to control. Over time, many bakers prefer the French pin for its simplicity and versatility.
Budget option: A basic wooden rolling pin with handles costs around $8–$15. It doesn’t need to be fancy — just smooth, solid, and heavy enough to roll dough without too much effort. Look for one that’s at least 9–10 inches in the barrel.
A Sifter or Fine Mesh Strainer
Sifting flour and other dry ingredients removes lumps and aerates them, which results in lighter, smoother batters and doughs. A fine mesh strainer doubles as a sifter and is also useful for dusting powdered sugar over finished bakes, straining custards, and rinsing small grains.
Budget option: A basic fine mesh strainer (3–5 inches in diameter) costs around $6–$10 and is more versatile than a dedicated sifter. If you’d rather have a traditional sifter, those cost about the same.
A Pastry Brush
A pastry brush is used for brushing egg wash on pastry, glazing baked goods, buttering pans, brushing syrup onto cake layers, and more. It’s a small tool with a big impact on finishing.
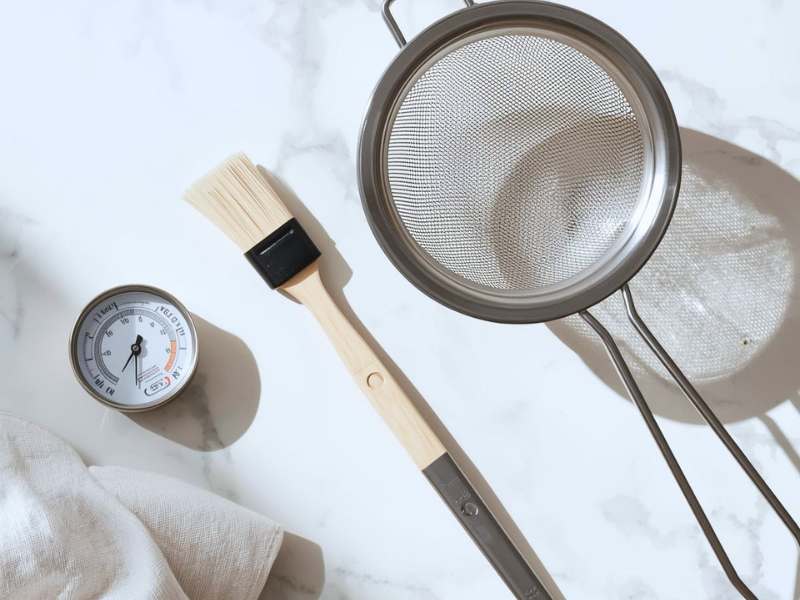
What to look for: Silicone pastry brushes are more hygienic and easier to clean than natural bristle brushes, which can shed. They’re also heat-resistant.
Budget option: A silicone pastry brush costs around $5–$8. Buy a couple — one for sweet applications and one for savoury.
An Oven Thermometer
This is possibly the most underrated tool in baking, and it costs almost nothing. Most home ovens don’t run at exactly the temperature you set them to. Some run 25°F too hot. Some run cold. Some have hot spots that are 50°F hotter than the rest of the oven.
Open this later: How to Bake Without an Oven
An oven thermometer hangs inside your oven and tells you the actual temperature, so you can adjust your dial accordingly. It’s the cheapest way to solve one of the most common causes of baking failures.
Budget option: A basic oven thermometer costs $6–$10. Hang it in the centre of your oven and check it every time you preheat. If your oven runs 25°F hot, just set it 25°F lower than the recipe says. Simple fix, huge improvement.
Helpful But Non-Essential Tools (Nice to Have as You Grow)
Once you’ve built your core toolkit, these are the next-level tools that will make baking even more enjoyable and expand what you can make.
A Pastry Cutter (Pastry Blender)
Used for cutting cold butter into flour when making pastry, scones, and biscuits. It does the same job as rubbing in with your fingers, but faster and with less warmth transferred from your hands to the butter. Costs around $8–$12.
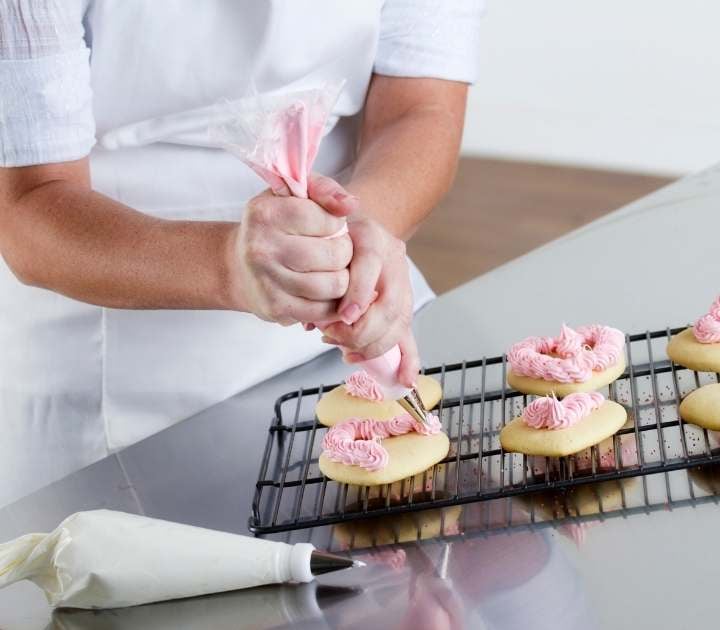
A Piping Set
A set of piping bags with a few basic piping tips opens up the world of cake decorating, filling pastry, and piping meringue or choux. A basic set of reusable bags and tips costs around $10–$15 and will take you far.
A Cake Turntable
If you want to frost cakes smoothly, a turntable is a game-changer. You place the cake on the spinning platform and rotate it as you apply frosting, making it much easier to get a smooth, even finish. Entry-level plastic turntables cost around $10–$15.
A Digital Instant-Read Thermometer
A thermometer isn’t just for meat — it’s incredibly useful in baking too. It tells you when your bread is properly cooked through (internal temperature of around 190–200°F/88–93°C), when your sugar syrup has reached the right temperature for candy-making, and whether your custard is properly set. A good digital instant-read thermometer costs around $15–$25.
A Dough Scraper (Flexible)
A flexible plastic dough scraper is softer than the metal bench scraper and is perfect for scraping every last bit of batter from a bowl, handling sticky bread dough, and cleaning soft doughs from your work surface. They cost around $3–$5 each and are well worth keeping a couple around.
A Springform Pan
A springform pan has removable sides, making it essential for cheesecakes, no-bake cakes, and layered tarts where you can’t flip the pan upside down to release. A 9-inch springform pan costs around $12–$20 and opens up a whole new category of recipes.
Building Your Kit on a Budget: A Starter Priority List
Where to Start if You’re on a Tight Budget
If you’re working with limited funds and want to get the most out of every dollar, here’s a simple priority order for building your beginner baking kit:
Start here (under $50 total): Dry and liquid measuring cups, measuring spoons, one large mixing bowl, a rubber spatula, a whisk, a baking sheet, a 9×13 inch pan, and a roll of parchment paper. With this basic kit, you can make cookies, brownies, muffins, quick breads, sheet cakes, and more.
Add next (around $30–$50 more): A kitchen scale, a hand mixer, a loaf pan, a muffin tin, and a cooling rack. With these additions, your baking options expand significantly and your accuracy improves dramatically.
Build over time: Round cake pans, a stand mixer, a rolling pin, a springform pan, piping supplies, and specialty tools as your baking interests develop.
You don’t need everything at once. You just need enough to get started, and you build from there.
Tips for Buying Baking Tools on a Budget
How to Save Money When Buying Baking Equipment
Check thrift stores and charity shops. Baking equipment is one of the best things to find secondhand. Mixing bowls, pans, rolling pins, and measuring tools show up regularly in thrift shops at a fraction of retail price. The only tools I’d be cautious about buying secondhand are non-stick pans (scratched coatings are a health concern) and electric appliances.
Buy in sets. Mixing bowls, measuring cups, and measuring spoons are almost always cheaper in sets than bought individually.
Skip the “baking kits” at big retailers. Pre-packaged baking starter sets often contain low-quality tools that won’t last, or tools you simply don’t need. Build your own kit from individual pieces — you’ll get better quality for less money.
This guide will help you: Common Baking Mistakes and How to Fix Them Fast
Don’t pay for brand names on basics. For simple tools like wooden spoons, spatulas, whisks, and measuring cups, a generic brand works just as well as a premium one. Save your money for tools where quality genuinely matters — like a kitchen scale or electric mixer.
Check restaurant supply stores. These shops sell professional-grade bakeware (like those aluminium half-sheet pans) at very reasonable prices. The products are often better quality than what you’d find in a home goods store, and they last much longer.
Amazon basics and off-brand kitchen tools are often excellent quality at very low prices. Read reviews carefully, but don’t dismiss cheaper options just because of the price tag.
Save for later: Aesthetic Baking Setup Ideas For Beginners
Final Thoughts
Here’s what it comes down to: the best baking kit isn’t the most expensive one. It’s the one you actually use.
A $10 set of measuring cups used correctly will always outperform a $50 set left unused in a drawer. A basic aluminium baking sheet lined with parchment paper will give you better cookies than a fancy non-stick pan used carelessly.
Start with the essentials. Learn to use them well. Add tools as you grow into them, and as your baking interests guide you. That’s how every great home baker builds their kitchen — not all at once, but one well-chosen tool at a time.
So pick up those measuring cups, grab a spatula, and get baking. Your kitchen is more equipped than you think.