Baking Station Organization Ideas That Will Transform Your Kitchen
Disclosure: Some of the links in this post are affiliate links. This means if you click on the link and purchase an item, I will receive an affiliate commission at no extra cost to you.
Let’s be real, most home kitchens aren’t designed with baking in mind. The flour is somewhere at the back of a cupboard, the measuring cups are in a drawer with seventeen other things, the stand mixer is on the floor because there’s no counter space, and finding the right baking pan means unpacking the entire stack every single time.
It works. But it’s frustrating. And that frustration is one of the main reasons people bake less than they’d like to.
But, transforming your baking setup doesn’t require a new kitchen. It doesn’t even require a lot of money. What it does require is a bit of thought, a few smart aesthetics baking station organization ideas that will transform your kitchen decisions, and a willingness to rethink how your current space is being used.
In this guide, you’ll see practical baking station organization ideas that will make your kitchen more functional, your baking sessions more enjoyable, and your space genuinely nicer to be in. Whether you’re working with a tiny apartment kitchen or a spacious one you’ve never quite figured out how to optimize, there’s something here for you.
Baking Station Organization Ideas That Will Transform Your Kitchen
1. Start With a Clear-Out: The Foundation of Any Good Organisation
This is the step most people want to skip, and it’s also the most important one. You cannot organise a cluttered space — you can only rearrange the clutter. So before you buy a single basket or jar, do an honest clear-out of everything baking-related in your kitchen.
Pull it all out. Every pan, every tool, every half-used bag of flour, every gadget you bought once and haven’t touched since. Lay it all out where you can see it.
Now sort it into three categories: things you use regularly, things you use occasionally, and things you never use. Be honest. That doughnut pan you’ve used once in three years? Donate it. The duplicate spatulas you’ve accumulated? Keep one, donate the rest. The baking tools that are broken, warped, or worn out beyond use? Bin them.
What you’re left with after this process is a realistic picture of what you actually need to organise — and it’ll probably be less than you started with. That’s a good thing. Less stuff means easier organisation, less visual clutter, and a space that’s much simpler to keep tidy.
2. Dedicate a particular area of your kitchen for baking
One of the biggest game-changers in kitchen organization is the idea of zones; grouping related items together so everything you need for a particular task is in one place.
Your baking zone should have everything you need within reach: your dry ingredients, your measuring tools, your mixing bowls, your most-used baking tools. Ideally, it should be close to your oven and near a clear stretch of counter where you can actually work.
Don’t lose this guide: Dream Baking Kitchen Inspiration (Pinterest – Worthy Setup)
In practice, your baking zone might be:
- A dedicated section of countertop with ingredient storage above or below
- A kitchen island or cart that you use specifically for baking prep
- One section of a larger kitchen that you’ve intentionally designated as the baking area
The exact location matters less than the principle: keep your baking things together, and make sure they’re accessible from your main working surface.
3. Keep the Counter Clear
Your counter space in the baking zone is valuable real estate. The goal is to have a clear, usable surface whenever you want to bake — not one you have to clear before you can begin.
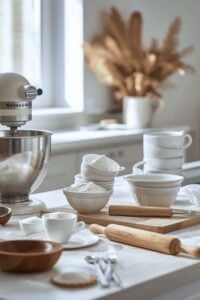
Decide what earns a permanent spot on your baking counter. For most people, this is the stand mixer (if you have one), the ingredient canister set, and perhaps a wooden board or marble slab. Everything else lives in a cupboard or drawer.
One useful rule: if you use something fewer than three times a week, it probably doesn’t need to be on the counter. Store it away and bring it out when you need it.
How to Store Baking Ingredients Properly
Baking Station Organization Ideas That Will Transform Your Kitchen includes storing ingredients well. Baking ingredients are at the heart of any good baking station, and how you store baked goods affects both how accessible they are and how long they stay fresh.
1. Switch to Airtight Containers
If your flour, sugar, and other dry ingredients are still living in their original paper bags, this is your sign to upgrade. Paper bags don’t seal properly, they tear, they let in moisture and pests, and they make it nearly impossible to see how much you have left.
Airtight containers — whether glass jars, clip-top canisters, or lidded plastic containers — solve all of these problems at once. They keep ingredients fresh for longer, they’re easy to see into, and when they’re all lined up together they look genuinely tidy and intentional.
What to decant into containers: All-purpose flour, bread flour, cake flour, granulated sugar, caster sugar, brown sugar, icing sugar, cocoa powder, rolled oats, cornflour, baking powder, bicarbonate of soda, and any grains, seeds, or dried fruits you bake with regularly.
A note on sizing: Use large containers for ingredients you go through quickly — flour and sugar — and small ones for things you use in smaller amounts, like cocoa powder or baking powder. Matching sizes and styles will always look more organised than a mix of random containers.
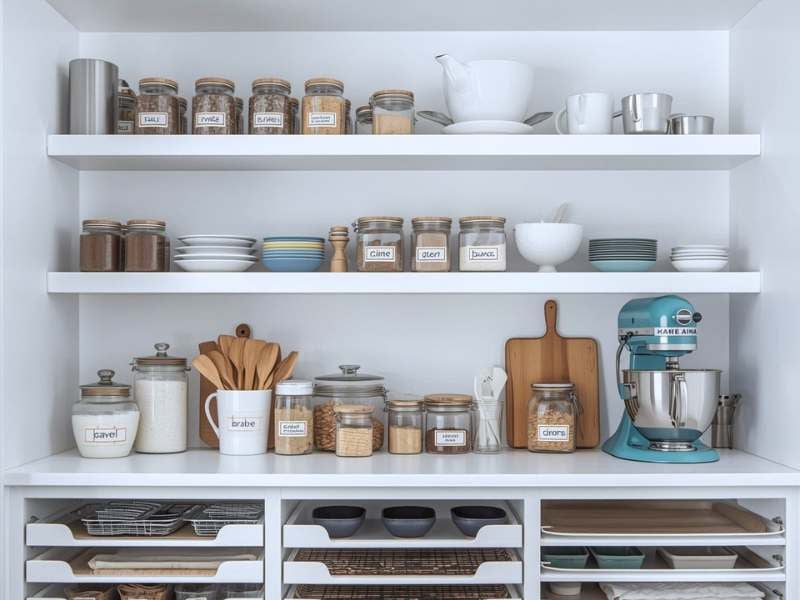
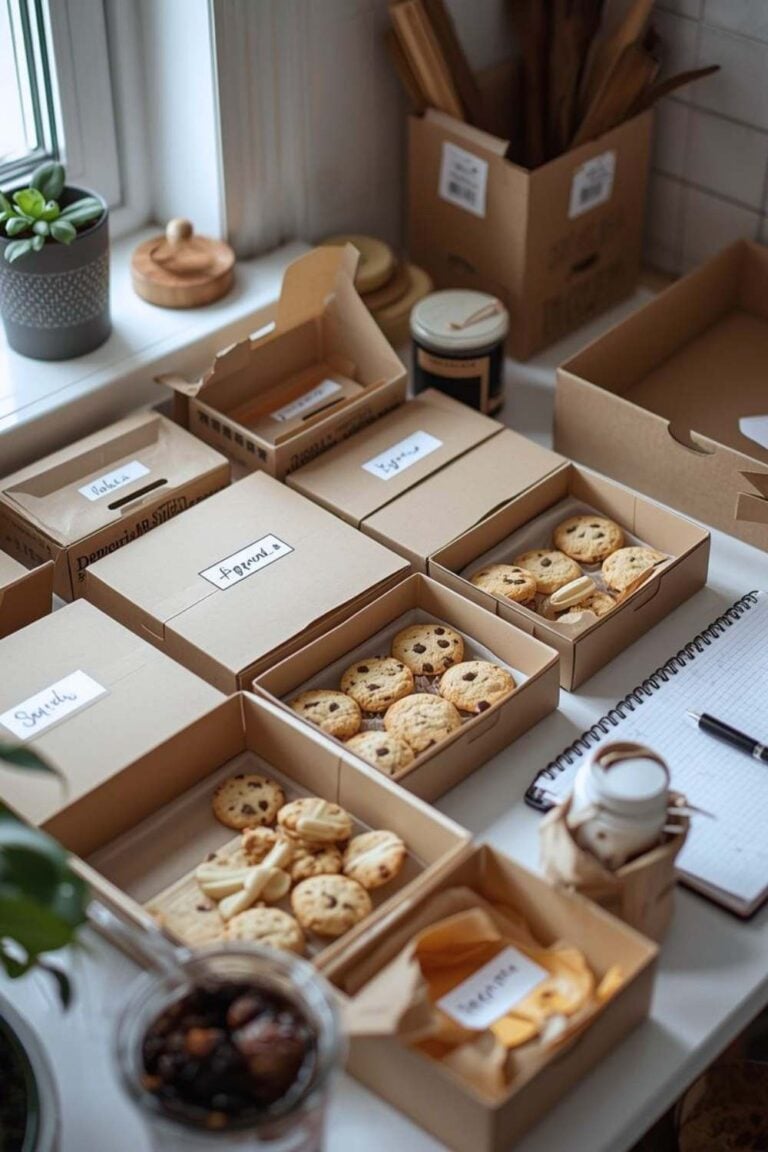
2. Label Everything
This sounds obvious but is one of those things people skip and then regret. Plain flour and icing sugar look almost identical in a jar. Baking powder and bicarbonate of soda are very easy to confuse when you’re in the middle of a recipe and not paying close attention. Bread flour and cake flour look exactly the same.
Label every single container — clearly, consistently, and in a way that matches your overall aesthetic. Options include:
A label maker for clean, uniform printed labels. Chalk labels (reusable and easy to change). Kraft paper tags tied with twine for a more rustic feel. Simple white stickers with a permanent marker for a no-fuss option.
Whichever you choose, keep them consistent across all your containers. A cohesive labelling system pulls the whole thing together visually.
3. Organize by How Often You Use
Store ingredients you use most often — flour, sugar, butter, eggs — where they’re easiest to reach. Frequently reached items belong at eye level or on the most accessible shelf.
Ingredients you use less often — almond flour, specialty sugars, dried fruit, decorating supplies — can live further back or on higher/lower shelves. You don’t need to reach for them every time you bake, so it doesn’t matter if they take a few extra seconds to retrieve.
How to Store Baking Tools Properly
Once your ingredients are sorted, it’s time to think about your tools. Baking tools range from small (measuring spoons) to bulky (stand mixer, large mixing bowls), and good organisation means having a strategy for everything.
1. Store Baking Sheets and Pans Vertically
This is one of the single best upgrades you can make to your pan storage. If you’re currently stacking pans flat on top of each other, you know the frustration — getting to the one on the bottom means lifting and moving the entire stack, and they’re always in the wrong order.
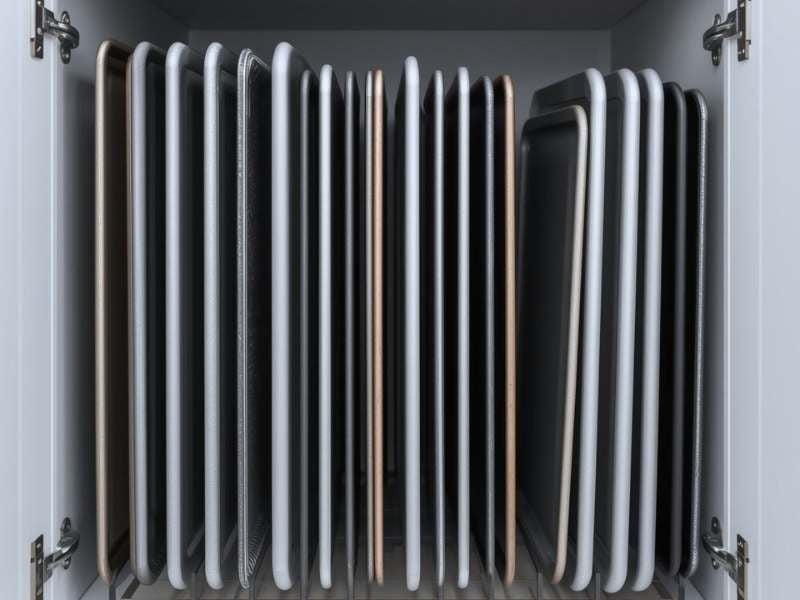
Storing pans vertically changes everything. Use a pan organiser (a rack with vertical dividers), a file organiser from a desk supply store, or tension rods installed inside a cupboard to create vertical slots. Each pan slides in and out independently, in seconds, without disturbing the rest.
This works for baking sheets, round cake pans, rectangular pans, muffin tins, and even cutting boards. Once you try it, you’ll never stack pans flat again.
2. Use a Utensil Crock for Everyday Tools
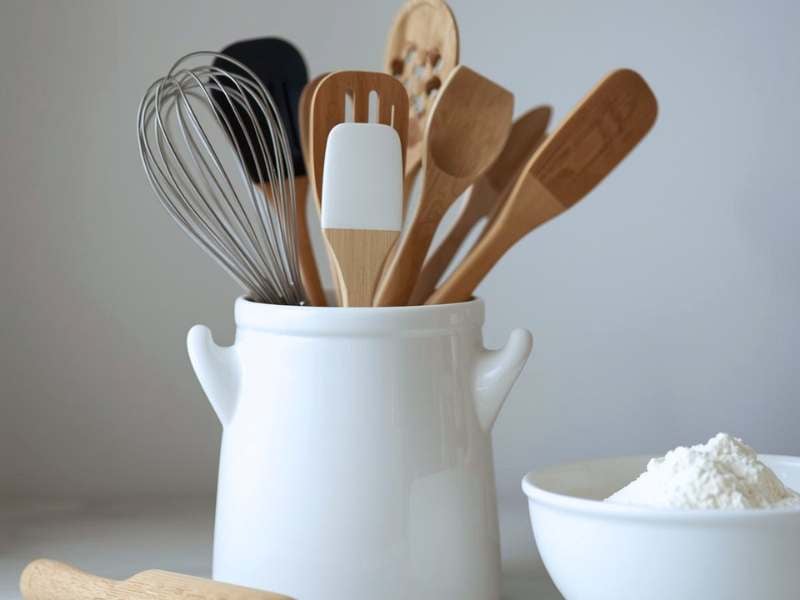
Your most-used baking tools — spatulas, wooden spoons, whisks, a bench scraper — deserve a spot that’s both accessible and tidy. A ceramic or stoneware crock sitting on or near your baking counter means these tools are always within arm’s reach when you’re in the middle of a recipe.
Keep only the tools you use regularly in the crock. Overcrowding it defeats the purpose — it just becomes a jumble. Five to eight tools is about right for most people.
3. Drawer Dividers for Smaller Tools
Measuring cups, measuring spoons, pastry brushes, spatulas, and dough scrapers all need a home in a drawer. Without dividers, drawers become chaotic quickly — everything slides around, things get buried, and you end up taking everything out to find what you need.
Drawer dividers (expandable bamboo dividers are great) create designated spots for each category of tool. You can see everything at a glance, and returning items to their spots takes no thought at all.
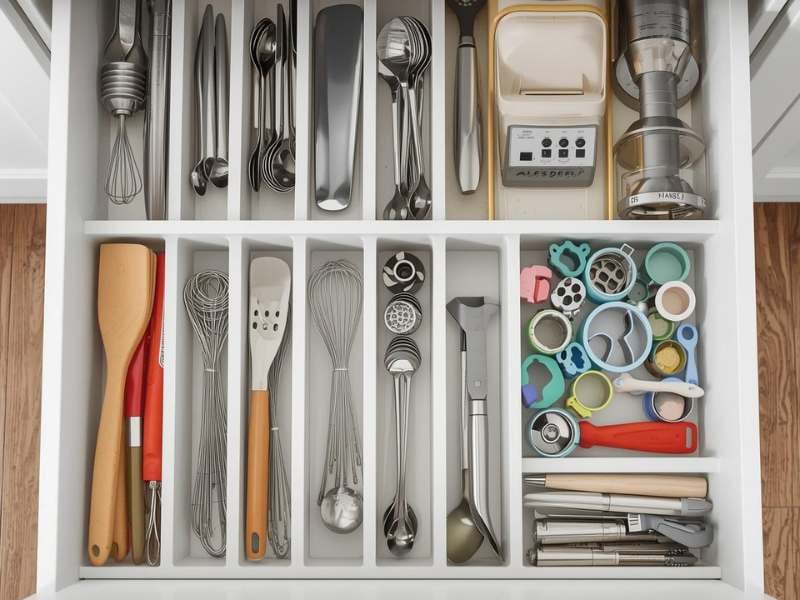
4. A Dedicated Baking Drawer
If you have the drawer space, consider giving baking a dedicated drawer (or two) separate from your general cooking tools. A baking drawer might hold: measuring cups and spoons, a pastry brush, a bench scraper, a dough scraper, a small rolling pin, skewers and toothpicks, and piping tips. Having everything in one place means you never have to search for baking-specific tools through general kitchen clutter.
4. Hang What You Can
Hooks, pegboards, and magnetic strips are excellent for getting tools off the counter and out of drawers while keeping them accessible and visible.
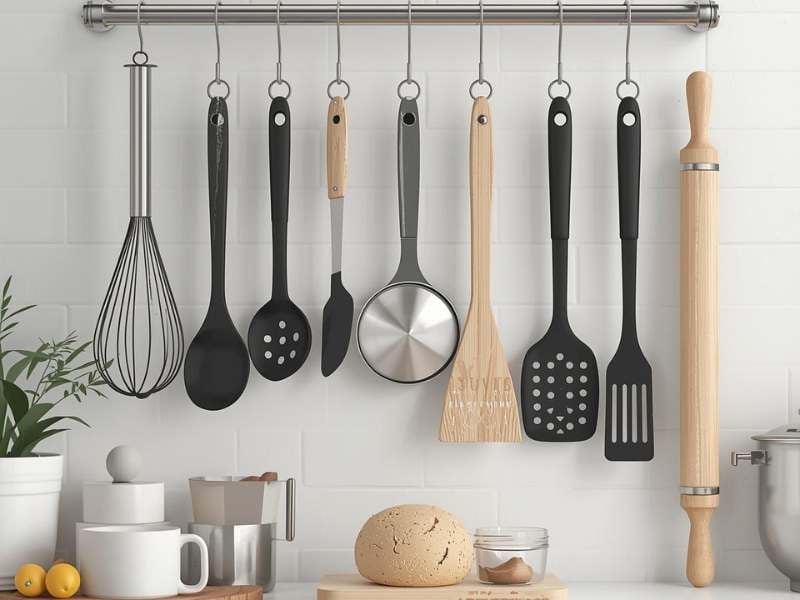
A pegboard mounted on a kitchen wall is one of the most versatile and genuinely satisfying organisation solutions for a baking space. You can customise the hook arrangement completely, hang tools of any size, and see everything at a glance. It also looks great — especially with matching hooks and a painted or stained board.
Hooks on the inside of cabinet doors are another underused space. They’re perfect for hanging measuring cups, small colanders, and lightweight tools.
The Baking Cart or Trolley: A Game-Changer for Small Kitchens
If your kitchen is small, a rolling kitchen cart or trolley can be one of the most impactful organisation purchases you make. It gives you extra counter surface when you need it, extra storage underneath, and the flexibility to move it wherever it’s most useful.
When you’re not baking, the cart can roll into a corner or against a wall. When you are baking, wheel it next to your main work surface for extra space and have all your baking essentials stocked right on it — ingredient jars, tools, your scale — so everything moves with you.
Carts with a butcher-block or wooden top double as chopping and rolling surfaces. Those with a lower shelf provide excellent storage for mixing bowls, baking pans, or a stand mixer. Those with drawers give you additional tool storage.
Styled with matching jars and a few well-chosen items, a kitchen cart looks intentionally beautiful rather than makeshift. It’s one of those pieces that earns its place immediately.
Baking Spices and Flavorings Organization
Baking spices and extracts have a way of multiplying and then hiding. Cinnamon in one cupboard, nutmeg somewhere else, three half-used bottles of vanilla extract from different times you couldn’t find the one you already had. Sound familiar?
Grouping all your baking spices and flavourings together — in one dedicated drawer, on one shelf, or on a small spice rack — means you always know where to look and you can see at a glance what you have and what you’re running low on.
Alphabetical order works well for larger collections. Frequency-of-use order works well for smaller ones — most-used at the front, rarely-used at the back.
A small turntable or lazy Susan inside a deep cupboard is brilliant for spice storage — spin it to bring things to the front without reaching to the back of the shelf.
Decorating and Specialty Supplies
If you’re into cake decorating, sugar work, or cookie decorating, you’ll quickly accumulate a collection of piping tips, food colourings, sprinkles, edible decorations, and other specialty supplies that can very easily take over an entire cupboard.
1. Use a Dedicated Baking Box or Caddy
A deep storage box, a craft organiser, or a dedicated baking caddy with compartments is ideal for decorating supplies. Piping tips can be stored in a small jar or a tip organiser. Food colouring gels can stand upright in a small container. Sprinkles look wonderful in small glass jars lined up in a row.
Keep all of this together in one place — ideally a box or container that can slide in and out of a cupboard easily. When you want to decorate, you pull out the box. When you’re done, everything goes back in and the cupboard door closes neatly.
Managing the Stuff That Doesn’t Fit in Your Everyday Zone
Not everything can live in your baking zone. Seasonal items, specialty pans used once or twice a year, and bulk ingredient supplies need a secondary storage location.
A high shelf, a lower cabinet, or a spare storage area elsewhere in the kitchen (or even a pantry) works well for these items. The key is to be intentional about what goes in deep storage versus what lives in your everyday accessible zone.
Label boxes and bins in deep storage just as carefully as your everyday containers — if you can’t see what’s inside, you’ll forget it’s there or spend too long searching for it.
Small Habits That Keep an Organised Baking Station Organised
1. Maintaining Your Baking Station
Organisation is easy to set up and surprisingly easy to maintain — if you build a few small habits alongside it.
Put things back immediately. After every baking session, return every tool to its spot before you leave the kitchen. It takes two minutes and prevents the slow creep of clutter that undoes good organisation over time.
Do a monthly check-in. Once a month, quickly scan your baking station. Are ingredients running low? Are things drifting out of their designated spots? Has anything accumulated that doesn’t belong? A five-minute monthly reset keeps things consistently tidy.
Replenish before you run out. When a container of flour or baking powder gets down to the last quarter, add it to your shopping list. Running out mid-recipe is frustrating and avoidable.
One in, one out. When you buy a new baking tool or piece of equipment, be honest about whether it’s replacing something or adding to the collection. If it’s a replacement, remove the old item. If it’s genuinely new, make sure you have a designated spot for it before it comes home.
Final Thoughts
A well-organised baking station doesn’t happen overnight, and it doesn’t have to. Start with the clear-out, create your baking zone, sort out your ingredient storage, and tackle the tools. Do it in stages if you need to. Small, consistent improvements compound quickly.
What you’ll notice, almost immediately, is that baking starts to feel easier. Not because your technique has changed, but because the friction of getting started has gone down. Everything is where it should be. You can begin baking in minutes instead of spending the first fifteen looking for things.
That’s the real transformation — and it has nothing to do with aesthetics.