The Ultimate Beginners Guide to Baking (Everything You Need To Know to Start)
So, you’ve decided to bake. Maybe you watched someone pull a loaf of bread out of the oven and thought, “I want to do that.” Maybe your sweet tooth finally got the better of you. Or maybe you’re just tired of paying bakery prices for pstries you could (probably) make at home. Whatever brought you here, just know that you’re in the right place.
Here’s the truth no one tells beginners: baking is not as scary as it looks. Yes, it’s more technical than cooking. Yes, there’s a little bit of science involved. But once you understand the basics, the recipes, and the measurements, everything falls into place.
This Ultimate Beginners Guide to Baking covers absolutely everything a beginner needs to know before you preheat your first oven. From the tools you’ll need to the ingredients on your shopping list, the techniques that make or break a bake, and the beginner mistakes you’ll want to avoid — we’ve got you covered from scratch.
What Is Baking, Really?
Before we dive into everything you need to know about baking, let’s take a second to understand what baking actually is.
Baking is a method of cooking that uses dry heat, usually in an oven, to cook food. What makes it different from other cooking methods is that it relies heavily on precise measurements, chemical reactions, and timing. When you bake, ingredients like flour, butter, eggs, sugar, and leavening agents interact with heat to create structure, texture, and flavor.
Bookmark this: How to Bake Without an Oven
Unlike cooking a stew where you can taste and adjust as you go, baking is a bit of a commitment. You mix, you put it in the oven, and then you wait. That’s why understanding your ingredients and your process before you start is so important. This is also why the ultimate beginners guide to baking is here to help you make the right decision.
Why Baking Is Worth Learning
If you’re still asking if this is something you really need to get into, then read this guide. The ultimate beginners guide to baking explains why baking is one of the most rewarding kitchen skills you can develop:
1. It’s deeply satisfying. There’s something almost therapeutic about measuring, mixing, and watching something transform in the oven.
2. It saves money. Homemade bread, pastries, and cakes cost a fraction of what you’d pay at a bakery and you can turn this into a very lucrative business.
3. It’s creative. Once you’ve mastered the basics, the possibilities are endless.
4. It’s a great life skill. From birthday cakes to holiday cookies, knowing how to bake means you’ll always have something to bring to the table always.
7. It’s actually fun. Especially when things go right. (And even sometimes when they go wrong, that’s how you learn.)
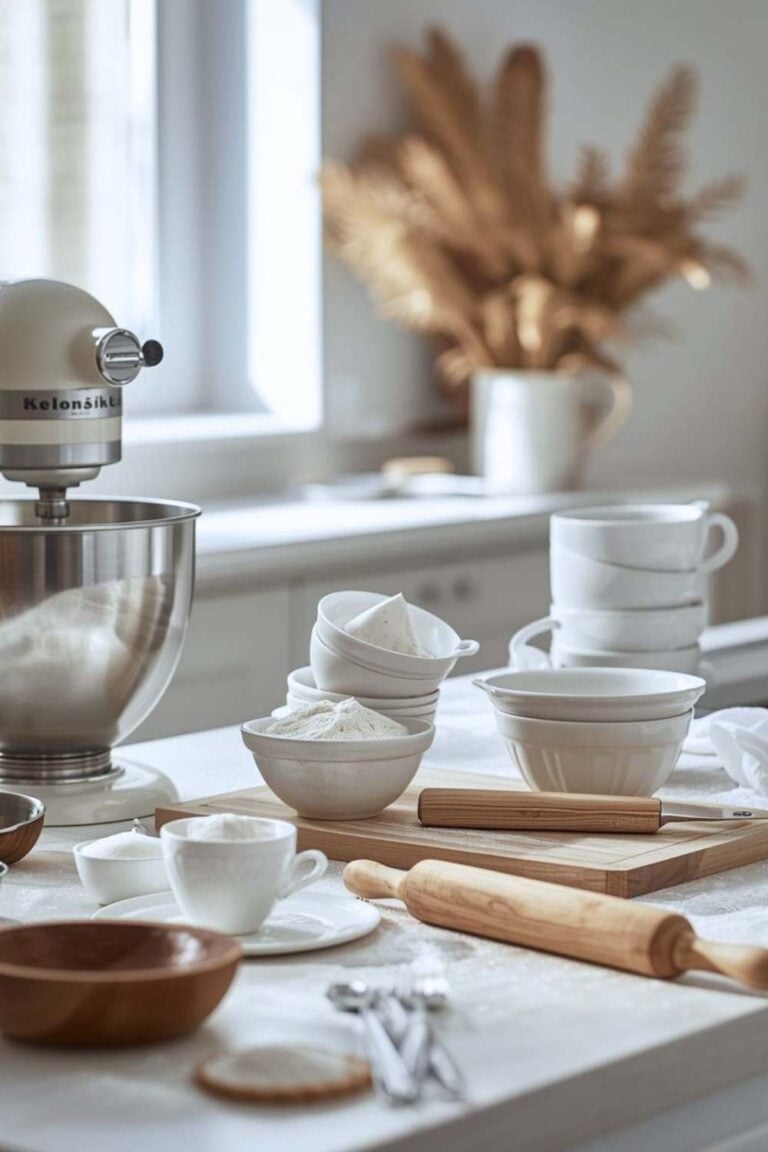
Setting Up Your Baking Space
1. Organize Your Kitchen Space Properly
Before you buy a single ingredient, let’s talk about your space. You don’t need a fancy kitchen to bake well. You just need a clean, organized workspace and an oven that (hopefully) works.
2. Clear your counter
Baking involves a lot of measuring, mixing, and moving things around. You need surface space. Clear a clean stretch of counter before you start any recipe.
3. Make sure your oven works properly
This sounds obvious, but oven temperature accuracy matters enormously in baking. Many home ovens run hot or cold. Investing in a simple oven thermometer (they cost just a few dollars) can save your bakes from disaster.
4. Keep your ingredients at room temperature
Unless stated otherwise, your ingredients should be kept at room temperature. Many recipes require butter or eggs to be at room temperature before you begin. Take them out of the fridge 30–60 minutes before baking.
Essential Baking Equipment for Beginners
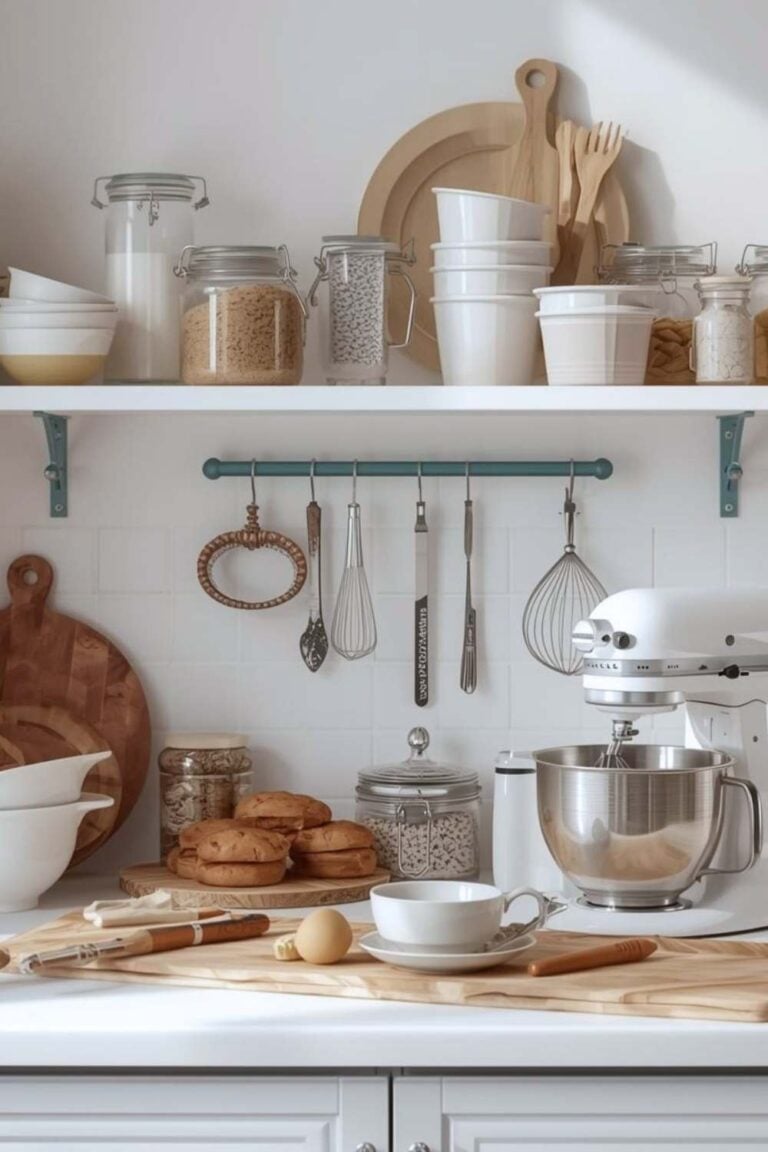
You don’t need to own every kitchen gadget on the market to bake. But there are a few tools that are absolutely essential. Think of this as your beginner’s equipment checklist. Some of these eessential baking tools include:
Measuring Tools
This is the most important category. Baking is a science, and inaccurate measurements lead to failed bakes. Period.
Measuring cups (dry and liquid): These are different things and should not be used interchangeably. Dry measuring cups are meant to be filled and leveled off. Liquid measuring cups (usually glass or clear plastic with a spout) let you read the measurement at eye level.

Measuring spoons: For small amounts of ingredients like baking powder, salt, or vanilla extract. Always level off the top with a flat edge for accuracy.
A kitchen scale: This is a game-changer, especially if you want to follow professional recipes. Measuring by weight (grams or ounces) is far more accurate than measuring by volume. Flour, for instance, can vary wildly depending on how you scoop it.
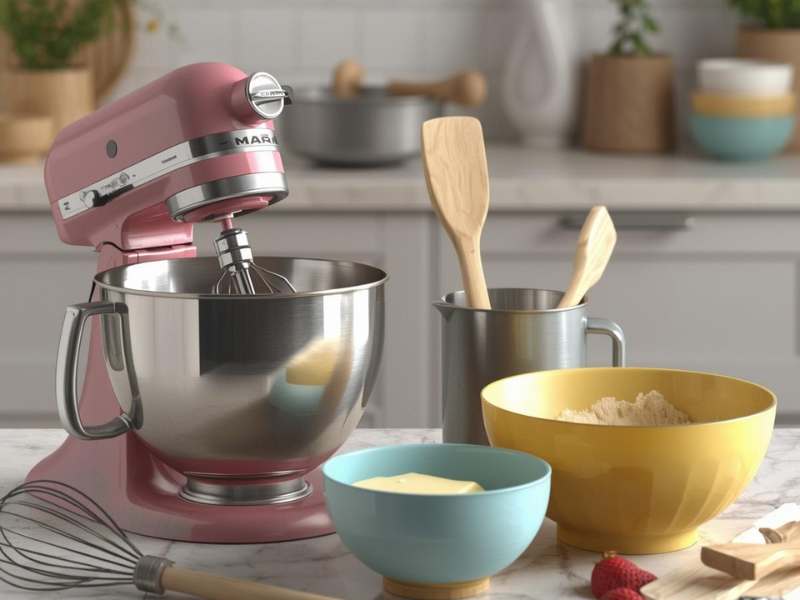
Mixing Tools
Mixing bowls: You’ll need at least two or three in different sizes. Stainless steel or glass bowls are ideal because they don’t absorb flavors and are easy to clean.
A whisk: Essential for combining dry ingredients, beating eggs, or mixing batters. A standard balloon whisk is all you need.
A rubber spatula: Great for folding ingredients together, scraping down the sides of the bowl, and making sure nothing goes to waste.
A wooden spoon or silicone spatula: For stirring thicker batters and doughs.
A hand mixer or stand mixer (optional but helpful): For recipes that require a lot of mixing like creaming butter and sugar or whipping cream a hand mixer saves a lot of arm work. A stand mixer is a worthwhile investment if you plan to bake regularly.
Baking Pans and Tins
Baking sheets/sheet pans: These are flat, rimmed metal pans used for cookies, sheet cakes, roasting, and more. Start with at least two.
A 9×13 inch baking dish: A versatile pan for brownies, bars, and sheet cakes.
Two 9-inch round cake pans: For layer cakes.
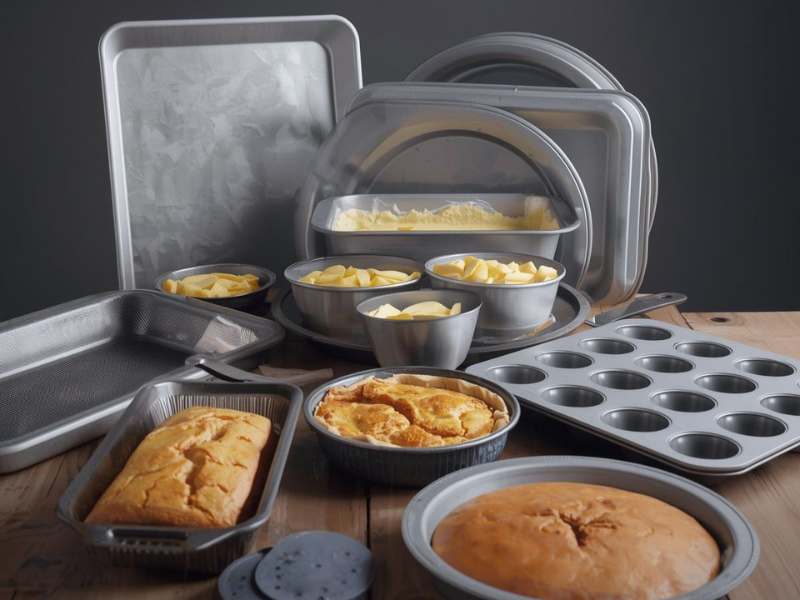
A loaf pan: For banana bread, pound cake, and basic loaves.
A muffin tin: For cupcakes and muffins. A standard 12-cup tin is perfect for beginners.
A 9-inch pie dish: If you plan to make pies or tarts. See this: Cute baking supplies you didn’t know you needed
Other Essential Baking Tools
Parchment paper: This is non-negotiable. Line your pans with parchment paper to prevent sticking and make cleanup effortless.
A cooling rack: Baked goods need to cool properly, and placing them on a wire cooling rack allows air to circulate underneath so they don’t go soggy.
A rolling pin: For rolling out pastry, cookie dough, and bread dough.
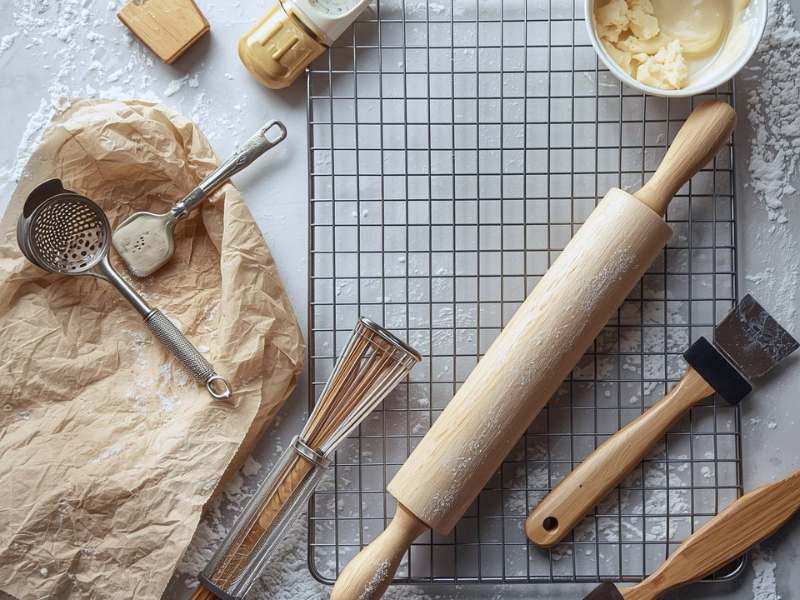
A pastry brush: For brushing butter, egg wash, or glazes onto baked goods.
A sifter or fine mesh strainer: For sifting flour and other dry ingredients to remove lumps and aerate the mixture.
A bench scraper (dough scraper): A flat metal blade used to cut dough, clean your counter, and portion cookies or bread. Surprisingly useful.
An oven thermometer: As mentioned earlier, this helps you know exactly how hot your oven really is.
Key Baking Ingredients and What They Do
This is where a lot of beginner bakers struggle. They follow recipes without understanding why each ingredient is there. When you understand the role of each ingredient, you’ll make better decisions, troubleshoot problems more easily, and eventually start adapting recipes with confidence.
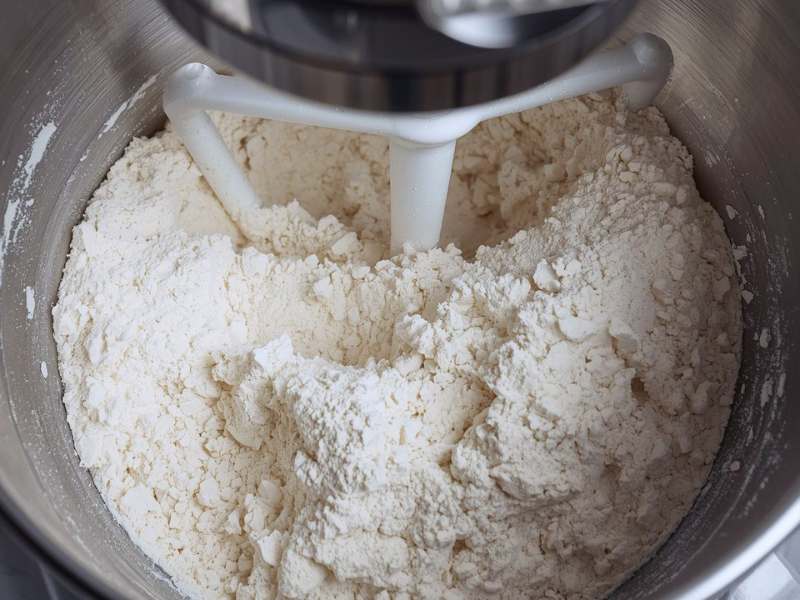
Flour
Flour is the backbone of most baked goods. It provides structure. When flour mixes with liquid and is worked (mixed or kneaded), proteins in the flour called gluten form a network that gives your baked goods their shape and chew.
All-purpose flour is the best starting point for beginners. It has a moderate protein content (around 10–12%) that works well in most recipes.
Bread flour has a higher protein content (12–14%), which develops more gluten. Perfect for chewy breads and pizza dough.
Cake flour has less protein (7–9%), giving cakes a finer, more tender crumb.
Self-rising flour already has baking powder and salt added. Never substitute it for all-purpose flour without adjusting your leavening agents.
Pro tip: Never scoop flour directly from the bag with your measuring cup — this compacts the flour and gives you too much. Instead, spoon the flour into the cup, then level it off with a straight edge. Better yet, weigh it.
Leavening Agents
Leavening agents are what make your baked goods rise. There are a few different types:
Baking powder is a chemical leavener that contains baking soda plus an acid (cream of tartar) and a starch. It creates carbon dioxide bubbles when it gets wet and again when it’s heated, causing batter to rise.
Baking soda (bicarbonate of soda) is a pure base. It needs an acid in the recipe (like buttermilk, yogurt, lemon juice, or brown sugar) to activate it. It’s more powerful than baking powder — a little goes a long way.
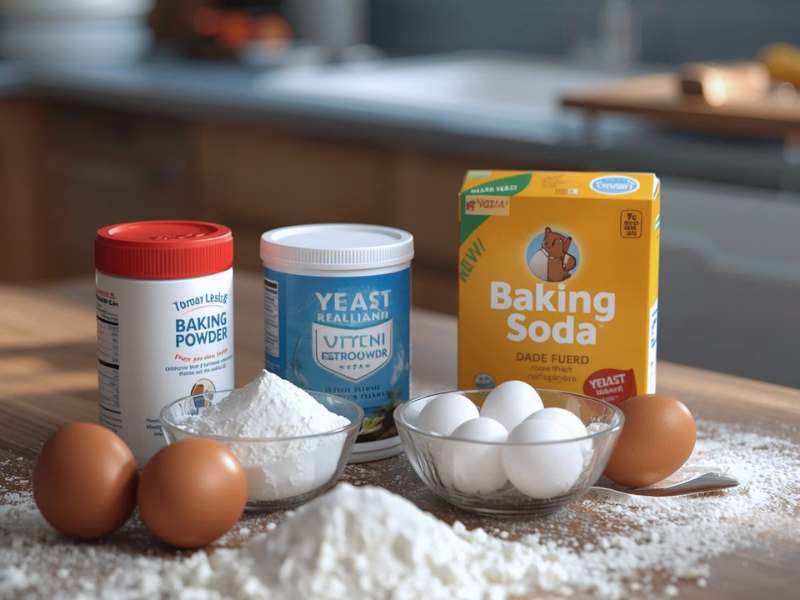
Yeast is a living organism used primarily in bread baking. It feeds on sugars and produces carbon dioxide, which makes dough rise. It also creates flavor. Yeast-based baking takes more time because the dough needs to rest and rise, but the results are totally worth it.
Eggs can also act as a leavening agent by trapping air when beaten.
Why this matters: Using too much or too little of a leavening agent can cause your bake to rise too fast and collapse, taste metallic, or not rise at all. Always measure carefully.
Fats
Fats add flavor, tenderness, moisture, and richness to baked goods. They also coat flour proteins, which limits gluten development and keeps things soft and tender.
Butter is the gold standard in baking. Unsalted butter is preferred because it lets you control the salt level in your recipe. It adds incredible flavor and creates beautiful flakiness in pastry and richness in cakes.
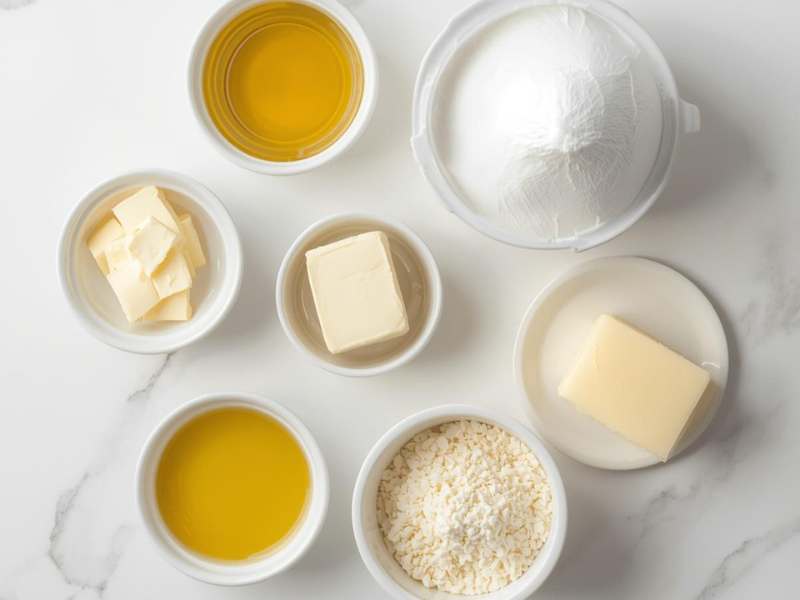
Oil keeps baked goods moist for longer than butter does. It’s great in carrot cakes, banana breads, and muffins where you want a tender, moist crumb.
Shortening is a solid vegetable fat. It has a higher melting point than butter, which makes it useful in pie crusts and cookies where you want a specific texture.
Lard is rendered pork fat, traditionally used in pie crusts and biscuits for exceptional flakiness.
Sugar
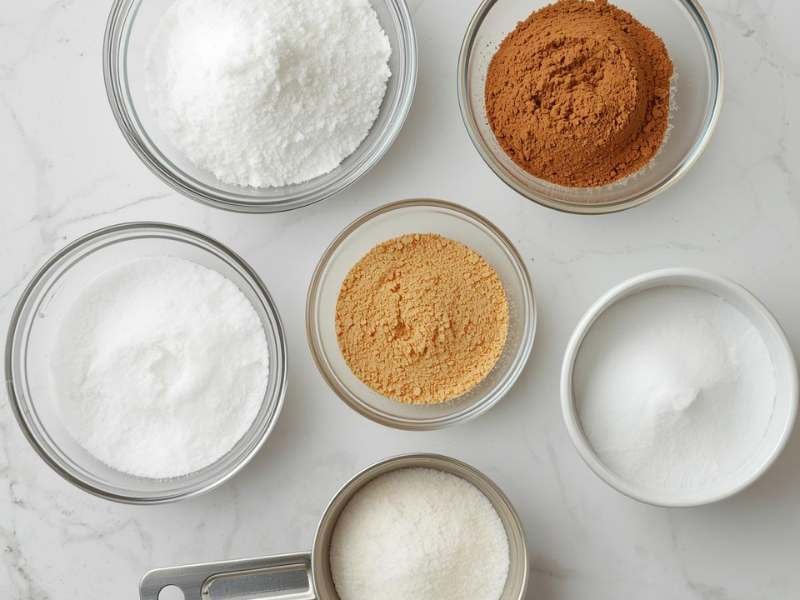
Sugar does so much more than just sweeten. In baking, it:
- Adds sweetness and flavor
- Tenderizes the crumb by interfering with gluten formation
- Helps baked goods brown (via a process called the Maillard reaction)
- Retains moisture, helping baked goods stay fresh longer
- Helps creamed butter trap air, adding lightness
Granulated white sugar is the most common. Brown sugar (light or dark) contains molasses, which adds a deeper, caramel-like flavor and extra moisture. Powdered sugar (icing sugar) is finely ground and used in frostings and dusting. Caster sugar dissolves more quickly than regular sugar and is great for meringues and delicate cakes.
Eggs
Eggs are multitaskers in baking. They contribute:
- Structure: Egg proteins coagulate when heated, helping set the structure of cakes, custards, and breads.
- Leavening: Beaten eggs trap air, helping bakes rise.
- Moisture and richness: Eggs add liquid and fat to batters.
- Binding: Eggs hold ingredients together.
- Color and shine: Egg wash brushed on pastry gives it that gorgeous golden finish.
Most recipes assume large eggs at room temperature unless stated otherwise. Cold eggs can cause butter to seize up and batter to split.
Liquids
Liquid hydrates flour, activates leavening agents, dissolves sugar, and helps bind everything together. Common liquids in baking include:
Milk: Adds fat, protein, and a mild flavor. Whole milk is best in most recipes.
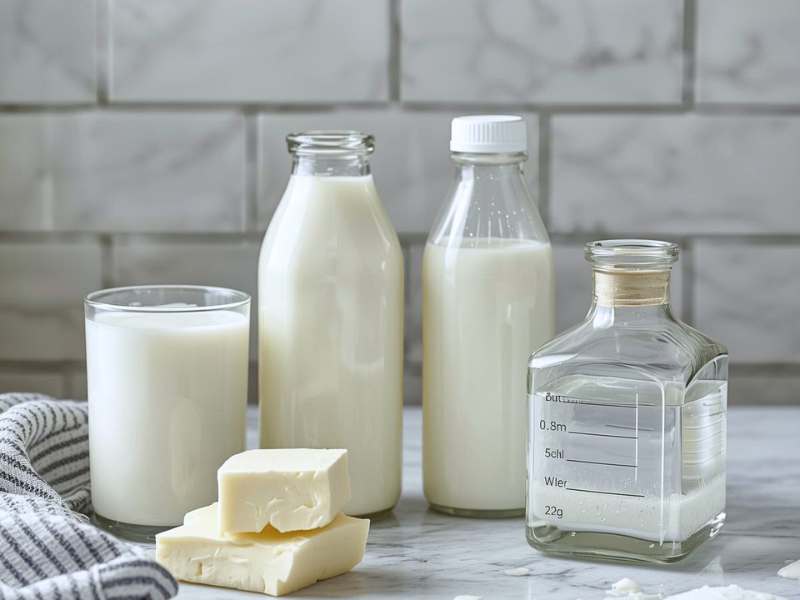
Buttermilk: The acid in buttermilk reacts with baking soda to add lift and a slight tang. It also tenderizes the crumb.
Water: Used mainly in bread baking and some pastry recipes.
Cream: Adds richness and fat. Used in ganaches, custards, and whipped cream.
Salt
Never skip the salt. Even in sweet recipes, salt is a critical ingredient. It:
- Enhances flavor and balances sweetness
- Strengthens gluten in bread
- Slows yeast fermentation so bread dough rises at the right pace
- Heightens the perception of other flavors
A tiny pinch in your cookie dough makes everything taste better. Trust it.
Vanilla Extract
Not technically essential, but practically speaking, vanilla is one of the most used flavoring agents in baking. Pure vanilla extract is made from real vanilla beans and has a complex, warm flavor. Avoid imitation vanilla if you can — the difference is noticeable.
Core Baking Techniques Every Beginner Must Know
You can have the best ingredients in the world, but if your technique is off, your bake will suffer. Here are the essential techniques you’ll use over and over again.
Creaming
Creaming means beating together butter and sugar until the mixture is light, pale, and fluffy. This technique is fundamental in making cakes and cookies.
When you cream butter and sugar, you’re doing two things: you’re incorporating tiny air bubbles into the fat, which helps your bake rise, and you’re beginning to dissolve the sugar crystals.
How to do it: Use softened (room temperature) butter and beat it with sugar using a hand mixer or stand mixer for 3–5 minutes on medium-high speed. The mixture should visibly lighten in color and become noticeably fluffy.
Common mistake: Using butter that’s too cold (it won’t cream properly) or too warm/melted (it won’t hold air).
Folding
Folding is a gentle mixing technique used when you want to combine ingredients without deflating air that’s already been incorporated. It’s used when adding whipped cream to batters, folding egg whites into cake batter, or combining flour into delicate mixes.
How to do it: Use a rubber spatula. Cut down through the center of the mixture, sweep along the bottom of the bowl, and fold up over the top. Rotate the bowl and repeat. Do this slowly and only as many times as needed to just combine — overmixing defeats the purpose.
Sifting
Sifting means passing dry ingredients through a fine mesh strainer to break up lumps and aerate the flour. Some recipes require this step, especially for cakes where you want a light, delicate crumb.
How to do it: Hold the sifter over a bowl and tap or squeeze to push the ingredient through. If you don’t have a sifter, a fine-mesh strainer works perfectly.
Rubbing In
This technique is used to incorporate cold fat (usually butter) into flour to create crumbly, flaky textures in pastry, scones, and crumble toppings.
How to do it: Cut cold butter into small cubes and drop them into your flour. Use your fingertips to rub the butter into the flour, working quickly so the heat of your hands doesn’t melt the butter. The goal is a mixture that resembles rough breadcrumbs, with some pea-sized butter pieces remaining.
Why it works: Those little pockets of butter create steam in the oven, which is what gives pastry and scones their flaky layers.
Kneading
Kneading is the technique used in bread making to develop gluten. Gluten gives bread its chewy texture and allows the dough to trap the gas produced by yeast, which makes the bread rise.
How to do it: Push the dough away from you with the heel of your hand, fold it back over itself, give it a quarter turn, and repeat. Most bread doughs need to be kneaded for 8–10 minutes by hand. The dough is ready when it’s smooth, slightly elastic, and springs back when you poke it.
Whisking
Whisking incorporates air into ingredients. It’s used for combining dry ingredients, beating eggs, making meringues, and whipping cream.
How to do it: Use a balloon whisk and move it in a rapid circular or figure-eight motion through the mixture. For whipped cream or egg whites, use a hand mixer for much faster results.
Proofing (for Yeast Breads)
Proofing is the process of letting yeast dough rise. This happens twice in most bread recipes: the first rise (bulk fermentation) and the second rise (after shaping).
During proofing, yeast consumes sugars and releases carbon dioxide, which inflates the dough. The longer the rise (within reason), the more complex the flavor of the bread.
Tips for proofing: Yeast is happiest in warm (not hot) environments. A good rule of thumb is to proof dough somewhere around 75–80°F (24–27°C). Covering the dough with a damp cloth or plastic wrap prevents it from drying out.
The Toothpick/Skewer Test
This is one of the most useful techniques for knowing when your cake or bread is done: insert a toothpick or skewer into the center. If it comes out clean or with just a few moist crumbs, it’s done. If it comes out with wet batter on it, it needs more time.
Understanding Your Oven
Your oven is your most important tool. And learning how it behaves is as important as any technique.
Preheating
Always preheat your oven. This is non-negotiable. Putting your batter or dough into a cold oven means it will bake unevenly, often setting before rising properly.
Give your oven at least 15–20 minutes to fully preheat. Even when the preheat indicator beeps, many ovens take a bit longer to stabilize at the correct temperature.
Oven Hot Spots
Every oven has hot spots areas that are slightly hotter than others. This is why your cookies might brown more on one side.
How to deal with it: Rotate your pan 180 degrees halfway through baking. This ensures more even browning.
Rack Position
Where you place your pan in the oven affects how it bakes.
- Middle rack: Best for most cakes, cookies, and muffins. Heat is most even here.
- Lower rack: Good for pies and tarts where you want the bottom crust to cook through and brown.
- Upper rack: Great for broiling or finishing something with a golden top.
Fan/Convection vs. Conventional
Conventional ovens heat from the top and bottom. Most recipes are written for conventional settings.
Fan/convection ovens have a fan that circulates hot air, cooking faster and more evenly. If your oven has a convection setting, reduce the temperature by about 15–25°F (or about 10–20°C) compared to what the recipe states, and check for doneness a few minutes early.
Reading and Following a Recipe
One of the most underrated skills in baking is knowing how to read a recipe before you start.
Read the Entire Recipe First
Before you measure a single thing, read through the whole recipe from top to bottom. This helps you:
- Understand the full process and timing
- Spot steps that require advance preparation (like chilling dough for an hour)
- Make sure you have all the ingredients and equipment
- Avoid surprises mid-bake
Understanding Recipe Language
Baking recipes use specific vocabulary. Knowing what these words mean prevents mistakes:
“Softened butter” means butter at room temperature pliable and soft to the touch, but not melted. Take it out of the fridge 30–60 minutes ahead.
“Room temperature eggs” means eggs that aren’t cold from the fridge. Cold eggs can cause batters to curdle.
“Fold” means mix gently to preserve air (see technique above).
“Scant” means just a tiny bit less than the measurement stated.
“Heaped” means more than a level measurement.
“Beat until stiff peaks form” (for egg whites or cream) means whip until the mixture holds a firm, upright peak when you lift the beater.
“Soft peaks” means the tip of the peak gently curls over when you lift the beater.
Mise en Place — Prepare Everything First
“Mise en place” is a French culinary phrase that means “everything in its place.” Before you start mixing, measure out all your ingredients, prep your pans, and have everything ready to go.
This is especially important in baking because once you start, you need to move through the steps efficiently. Stopping mid-recipe to search for your baking powder is a recipe for mistakes.
Common Beginner Baking Mistakes (and How to Avoid Them)
Even experienced bakers mess up sometimes. But knowing the common pitfalls can save you a lot of frustration early on.
Not Measuring Accurately
This is the number one cause of baking failures. Too much flour makes a dry, dense bake. Too much liquid makes it gummy and flat. Too much leavening causes it to rise fast and then collapse. Measure carefully, every single time.
See this: Baking Measurement Conversion Charts
Substituting Ingredients Without Understanding Them
Baking is chemistry. Randomly swapping one ingredient for another can completely change the outcome. Don’t substitute butter for oil, or baking soda for baking powder, without understanding how it will affect the final product.
Not Reading the Whole Recipe
Starting a recipe without reading it through is one of the most common beginner mistakes. You might discover halfway through that the dough needs to chill overnight — not great when you need it in an hour.
Overmixing
Overmixing develops excess gluten, which makes cakes and muffins tough and dense instead of light and tender. Mix just until ingredients are combined, especially once you’ve added flour to the batter. This is one of the reasons why your cakes keep failing.
Opening the Oven Door Too Early
It’s tempting. We know. But opening the oven door in the middle of baking lets heat escape and can cause a cake to sink. Resist the urge until the minimum bake time has passed.
Not Allowing Baked Goods to Cool
Cutting into a cake or bread before it’s fully cooled is a common mistake. The interior is still setting as it cools. Cutting too early can result in a gummy, underset crumb. Let things cool on a rack — patience is part of the process.
Using Cold Ingredients When the Recipe Calls for Room Temperature
Cold butter won’t cream properly. Cold eggs can cause a batter to split. Follow the recipe’s instructions for ingredient temperature it matters more than you might think.
Ignoring Your Oven’s Quirks
Every oven is different. Your oven might run 25 degrees hotter or cooler than the dial says. Get an oven thermometer, learn your oven’s habits, and adjust accordingly.
Food Safety and Hygiene in Baking
Baking safety doesn’t get talked about enough, but it’s important, especially for beginners.
Wash your hands before you start and after handling raw eggs. Raw eggs can carry salmonella.
Don’t eat raw dough or batter that contains raw eggs or raw flour. Both can harbor bacteria. (This is a hard rule to follow when the cookie dough smells amazing, but better safe than sorry.)
Use oven mitts always. Baking trays, pans, and oven racks are seriously hot. Don’t underestimate them.
Be careful with steam. When you open the oven door, especially from a water bath or a dish with a lot of moisture, the escaping steam can burn. Always open the oven door away from you.
Store baked goods properly. Most baked goods stay fresh for 2–4 days at room temperature in an airtight container. Cakes with dairy-based frostings or fillings should be refrigerated.
Building Your Baking Confidence
Like any skill, baking gets easier and more intuitive the more you practice. Here’s how to grow as a beginner baker:
Bake consistently. Even once a week is enough to build real skill. The more you bake, the more naturally you’ll understand how dough should feel, what properly creamed butter looks like, and how your oven behaves.
Take notes. When a recipe goes wrong (and sometimes it will), note down what you think happened. Did you overbake? Was your batter lumpy? Did you forget to sift? Writing it down helps you do better next time.
Start simple and build up. Master the basics before you try advanced techniques. There’s no shame in spending months just baking cookies and quick breads. Foundations matter.
Understand your failures. A failed bake is not wasted time — it’s information. Figure out what went wrong and try again. Every great baker has a cupboard full of “learning experiences.”
Invest in one good baking book. A reliable, well-tested baking cookbook is worth its weight in gold. Look for books that explain the why behind recipes, not just the how.
Trust your instincts (eventually). As you gain experience, you’ll develop a feel for baking that goes beyond the recipe. You’ll know when dough feels right, when a cake smells done, when something isn’t quite sitting correctly. That instinct is the real reward of consistent practice.
A Beginner’s Baking Glossary
Common Baking Terms You Should Know
Al dente – Usually used for pasta, but sometimes used in baking to describe a slightly firm, not-quite-done texture.
Baste – To brush or spoon liquid over something during baking to keep it moist and add flavor.
Batter – A pourable, liquid mixture of flour, eggs, fat, and other ingredients that becomes a baked good when cooked. Thinner than dough.
Blind baking – Pre-baking a pastry crust before adding the filling, usually with weights to prevent it from puffing up.
Bulk fermentation – The first, longer rise of yeast dough after mixing, before it’s shaped. Also called the first proof.
Caramelize – When sugar melts and turns golden brown under heat, developing complex flavor.
Chill – To refrigerate a dough or mixture until it’s cold and firm.
Coat – To cover food evenly with a layer of something (like flour or chocolate).
Convection baking – Baking using a fan-assisted oven that circulates hot air for faster, more even cooking. Usually requires a lower temperature than conventional baking.
Cream/Creaming – To beat butter and sugar together until the mixture is light, pale, and fluffy. A foundational technique in cake and cookie making.
Crumb – The interior texture of a baked good.
Crust – The outer shell of bread or pastry.
Dock – To poke holes in pastry or dough with a fork to prevent it from puffing up during baking.
Dough – A thick, workable mixture of flour, liquid, and other ingredients. Stiffer than batter and typically kneaded or shaped by hand.
Dust – To lightly coat a surface or baked good with powdered sugar or flour.
Egg wash – A mixture of beaten egg (and sometimes water or milk) brushed on pastry before baking for color and shine.
Fold – To gently incorporate ingredients without deflating air.
Ganache – A mixture of chocolate and cream, used as a glaze, filling, or frosting.
Glaze – A shiny coating applied to baked goods, usually made of sugar and liquid.
Gluten – A protein network formed when flour is mixed with liquid and worked. It gives bread its chew and baked goods their structure. More gluten = more chew; less gluten = more tenderness.
Knead – To work dough by pushing, folding, and stretching to develop gluten.
Laminate – To fold fat into dough in layers, as in puff pastry or croissants.
Leaven/Leavening – To cause a baked good to rise using a leavening agent.
Maillard reaction – The chemical reaction between amino acids and sugars that causes browning and flavor development in baked goods.
Mise en place – A French term meaning “everything in its place.” The practice of measuring and preparing all ingredients before you start mixing.
Peaks (soft and stiff) – Terms used to describe the consistency of whipped cream or egg whites. Soft peaks curl over gently when the beater is lifted; stiff peaks stand straight up and hold their shape.
Proof – To allow yeast dough to rise.
Quick bread – A bread leavened with baking soda or baking powder instead of yeast, requiring no rising time. Banana bread and muffins are examples.
Rest – To allow dough or batter to sit before baking; develops flavor and relaxes gluten.
Rubbing in – A technique where cold butter is worked into flour using fingertips until the mixture resembles breadcrumbs. Used for pastry, scones, and crumble toppings.
Score – To cut shallow lines in the surface of bread before baking, allowing it to expand in a controlled way.
Sift/Sifting – To pass dry ingredients through a fine mesh strainer or sifter to remove lumps and incorporate air, resulting in a lighter, smoother mixture.
Temper – To slowly bring ingredients to a similar temperature before combining (e.g., adding hot liquid slowly to eggs).
Water bath (Bain-marie) – A baking method where a pan is set inside a larger pan of hot water in the oven. Creates gentle, even heat and steam — used for cheesecakes and custards to prevent cracking.
Zest – The outer colored layer of citrus peel, full of flavorful essential oils.
Don’t skip this guide: Baking Terms Explained
Final Thoughts
Here’s the thing about baking —everyone starts somewhere. Every professional pastry chef, every celebrated home baker, every Instagram-perfect birthday cake maker was once standing in a kitchen like yours, holding a recipe they didn’t fully understand, hoping the thing in the oven would turn out okay.
You now have a solid foundation to build on. You know what your ingredients do, you know the tools you need, you understand the techniques, and you know what mistakes to watch out for. That’s genuinely more than most beginners start with.
So go buy some flour, soften your butter, and preheat that oven. Your baking journey starts now — and it’s going to be delicious.